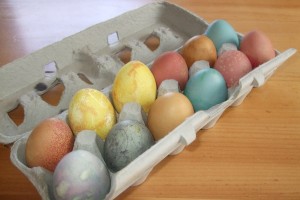
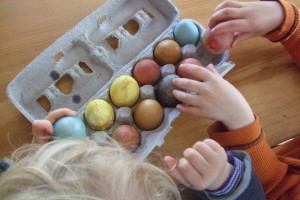
My mom told me the other day that my grandmother Rauha used to dye her own wool, out of natural materials. She was a big rug-hooker, and was always scrounging around in her pantry and back yard for materials to work with. Apparently onion skins were a favorite of hers. My mom remembers her mother boiling handfuls of the skins in a big pot on the stove, and said that she preferred the more subtle colors that these natural materials tend to provide. My grandmother died almost twenty years ago, and I do miss her, so it is such a treat that I still from time to time learn things about her life that I never knew before. Not big stuff–mostly day-to-day things things that she did, that my mom remembers and mentions off-handedly when I tell her about something that the boys and I are up to. Things like “your grandmother once had hot sugar syrup spill off the stove onto her bare foot when her mother was canning peaches”, or “When your grandmother was living on the farm in Georgia as a kid, she and her brothers and sisters used to go into the chicken coop, each find an egg, poke a hole in it, and suck out the insides–it was a big treat for them!” So, that’s how the boiling onion skin story came up—I’d mentioned to my mom that the boys and I were dyeing eggs using natural materials. While onion skins are great for eggs as well as wool, we used some different natural materials for our eggs this week. For blues we used red cabbage and blueberries, for yellow we used turmeric, for brown we used ground coffee, and for red we used beets. I know, it’s odd that red cabbage would make a blue egg, but it does–and a beautiful robin’s egg blue at that. The blueberries color the egg a deeper, indigo-ish shade. Making these dyes is not hard, though it does take a bit of prep time. But it’s really fun and so worth it! With natural dyes, you have a lot of flexibility–when making the dye, just use more of the dye material (in relation to the amount of water) if you want a deeper shade, and less if you want a more subtle shade. You can also control the intensity of the dye by how long you leave the egg in the dye. And, there are of course many other natural materials that could work well for dyeing beyond what I have listed here. Just experiment, and see what works for you! To get you started, below is the basic method that I use.
Naturally-Dyed Easter Eggs
Ingredients:
2 cups of beets, peeled and chopped
2 cups of thinly-sliced red cabbage
2 cups blueberries
1/4 cup ground coffee
1 tablespoon ground turmeric
white vinegar
water
1 dozen (or more) white eggs, hard-boiled
Directions:
1.) peel and chop ingredients as necessary, and hard-boil the eggs. Keep hard-boiled eggs refrigerated until ready to use.
2.) Place beets, cabbage, blueberries, turmeric, and coffee each in their own pot. Add three cups of water to each pot.
3.) Bring each pot to a boil, reduce heat, and simmer for 15 minutes. Remove from heat.
4.) Strain the solid matter out of each of the dyes. (You can compost the solid matter if you like, or save it for another use later). You will now have a different colored liquid from each of the five dye pots. Add one tablespoon of vinegar to each dye. Place each dye in a separate small-ish bowl.
5.) Dye your eggs! Simply set the eggs (gently!) in the bowls of dye however you like. Keep in mind that for natural dyes to work, the eggs have to sit in the dye for a bit (much longer than with chemical dyes). You will get nice color within about 20 minutes with the beets, blueberries, coffee, and turmeric, but the cabbage dye takes a couple of hours to color the egg nicely.
6.) Keep checking on your eggs to see how the colors are coming along, and whenever you think they look good, just remove them, place them onto a towel or cooling rack to dry, then refrigerate. Enjoy!


bradley
July 30th, 2014 at 12:20