Last fall I bought 25 pounds of green cabbage from a local farm, and made sauerkraut with some of it right away. The remaining cabbages I stored in our basement refrigerator, and we’ve been enjoying them cooked in various ways over the past few months. Before they get all eaten up that way, though, I’ve been wanting to make one more batch of sauerkraut. I was up early with Connor and Ian this morning, and after breakfast I got a new batch going. Admittedly, it’s preferable to make sauerkraut out of fresh, newly-harvested cabbage, as it’s always best to preserve vegetables when they are at their freshest. But given that it’s march and there’s still half a foot of snow on the ground, our options are, shall we say…..a bit limited. So, root-cellared cabbages it is! As long as your older cabbages have been stored properly, using them for sauerkraut shouldn’t be a problem. Just make sure to peel off and discard the outer layers of the cabbage, or any other part of it that looks a bit worse for wear, so that you are only using fresh, crisp, green (or red, as the case may be) cabbage for your kraut. Also be aware that older cabbages often have a slightly lower water content, so getting your salted cabbage to produce a good amount of brine can sometimes be a challenge. If this is the case, just follow the directions below on how to make additional brine for your kraut.
Sauerkraut
Ingredients:
10 pounds cabbage
6 Tablespoons sea salt (or canning/pickling salt)
2 Tablespoons caraway (optional)
Special Equipment:
A ceramic crock or food-grade plastic bucket (1 gal. capacity needed for every 5 LBS cabbage)
A round plate that fits snugly inside the crock or bucket
A weight (such as a large glass jar filled with water)
A large dishtowel or cloth
Utensil for tamping down cabbage (must be stainless steel, wood, or plastic)
Method:
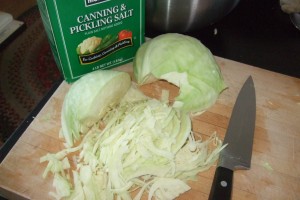
- Remove any wilted outer layers from the cabbage, then rinse cabbage thoroughly. With a chef’s knife, cut cabbage heads in half, and remove center cores. Then finely slice cabbage.
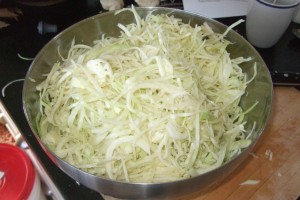
- Place cabbage in a large bowl as you cut it up. Add salt a little bit at a time as you go, and mix well as you go, using either your hands, or a utensil. This is to ensure that salt is evenly distributed throughout the cabbage. Once all cabbage has been cut up and placed in bowl, and all salt has been added, do one final, thorough mix.
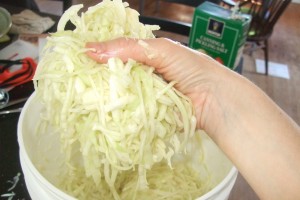
- Transfer the cabbage to the fermenting crock or bucket in batches, packing down each layer as you go. You can use your hands for this, or another utensil (such as a potato masher). Tamp the cabbage down gently but firmly to help extract juice and encourage the formation of a brine.
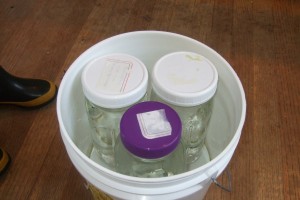
- Once all the cabbage has been packed into the fermenting container, place the plate on top of the cabbage and press down. Then place a weight on top of the plate. The brine should begin to rise above the plate. (Note: if the brine has not risen above the plate after 24 hours, add additional salt brine (1 cup water to 1 Tablespoon sea salt) as necessary. It is essential during fermentation that there is enough brine to completely cover the cabbage.)
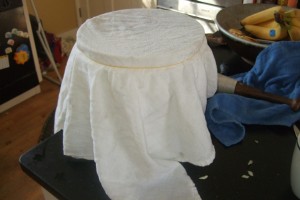
- Cover the fermenting container with a clean cloth or towel to keep out dust. Place a rubber band around the bucket to hold the cloth in place.
- Place the fermenting container in an easily accessible place where the temperature is somewhere between 60 and 75 degrees. A kitchen or a basement is often a good option. Ferment cabbage for roughly 1—4 weeks, or until done. At 70 degrees (my personal temperature of choice for fermenting), it is likely that your cabbage will be done fermenting in 3 or 4 weeks. In general, the warmer the temperature, the faster the fermentation. Temperatures above 75 degrees are not recommended, and may cause spoilage. Likewise, fermenting at temperatures below 65 degrees may take 5-6 weeks to fully ferment. Check on the ferment every day, or every couple of days. After a few days, scum or mold is likely to form on the surface of the brine. This is normal. Carefully remove and discard any surface scum or mold. Rinse any scum off of the weight and the plate. Make sure to carefully replace the plate and weight, and ensure that the cabbage is fully submerged in the brine. Then, replace the cloth and continue with fermentation. Note: Fermentation failures occasionally happen. If for some reason the cabbage smells bad, or has become slimy, mushy, or oddly-colored, the cabbage may have spoiled. Do not taste. Discard immediately.
- When the cabbage is fully fermented, place the finished sauerkraut into a clean container with a lid, refrigerate, and enjoy as you like! The sauerkraut may then be stored in the refrigerator for about 4—6 months. Or, sauerkraut may be canned for longer shelf-life. (Note: I will be providing directions for canning sauerkraut in an upcoming post. Check back soon for this!)


Donnie
July 30th, 2014 at 21:29