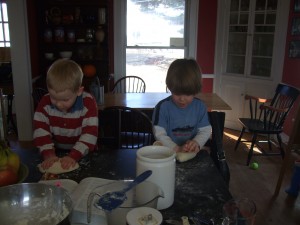
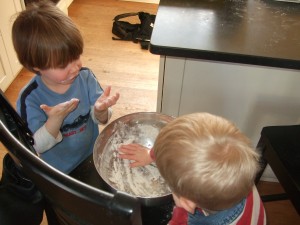
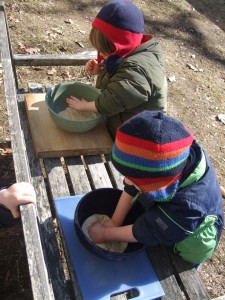
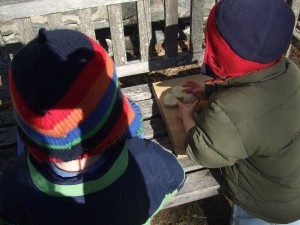
The boys played outside while the dough was rising. It was such an unseasonably warm, sunny March day that the thought of coming back inside was not very appealing. Nor, I have to admit, was the prospect of tromping three children (Tommy and Connor, plus my 19-month-old Ian)—coats, hats, muddy boots and all—back inside just to deal with the bread. So, I hauled dough, boards for kneading, baking pans, and a bucket of soap and water for handwashing, out to them. We set up on our weathered wooden bench near the garden, and Tommy and Connor gleefully punched down their own enormous, puffy, pillows of dough with their fists, while the humid, slightly muddy-smelling spring air mixed with the sweet, warm smell of yeasty dough. We were going to make bread, but the boys were having so much fun with the dough that I thought we’d make rolls instead, to give them more to do with the dough. They each shaped their dough into whatever kind of rolls they wanted, and stuck them into their own baking pan however they pleased. (Yes, admitedly, I kept having to remind myself that these creations were in fact for them and not for me, and it was ok if they looked not exactly pretty and perfect). Tommy’s mom arrived on time to take Tommy home right about then, so we didn’t get the bread totally done during the playdate (though, I think we could have, if I had been a bit more organized). But, they got to do all the fun stuff at least. Connor and I set all the rolls out for their last brief rise, and then baked them. Then, after naps, we walked Tommy’s finished rolls over to his house to drop them off. As for Connor, he was thrilled about his creation. The rolls were soft and chewy, with a beautiful golden-brown crust, and yes, very creatively-shaped. We had them for dinner that evening, and they were indeed delicious.
So, here’s the recipe. And by the way, this bread is great aside from just its playdate value. I’ve made the recipe a few times now, as both bread and as rolls. It makes two simple, straightforward white loaves. The bread dries out quickly if it’s heavily-toasted, but it’s excellent lightly-toasted or un-toasted for sandwiches. The rolls are soft and chewy, and especially delicious right out of the oven. Enjoy!
Playdate White Bread (or Rolls)
Makes 2 standard bread loaves, or 36 rolls
2 packages (4 1/2 teaspoons) instant (Rapid Rise) yeast
2 tablespoons sugar
2 cups warm water
¼ cup canola or vegetable oil (plus a little extra for greasing bowls and pans)
1 tablespoon salt
Directions:
- In a large mixing bowl, combine 5 cups of the flour, the yeast, sugar, warm water, canola oil, and salt, and mix well. (Sometimes it’s tough to fully combine the flour with the mixing spoon, as the dough is so thick. You can finish combining it during the kneading process if necessary.)
- Lightly flour counter or cutting board with a small amount of the final cup of flour. Turn dough onto counter and knead for 8-10 minutes. Add additional flour from the final cup of flour as needed to prevent sticking. Add only as much flour as you need; you likely won’t need all of it.
- Lightly oil the original mixing bowl. Put kneaded dough back into bowl. Cover with a damp, clean kitchen towel and allow to rise in a warm spot (85-100), for about 40 minutes, until roughly doubled in size.
- Remove the cloth. Then, making a fist with your hand, firmly punch the dough down in the bowl.
- Turn dough out onto counter and knead for 3 or 4 minutes. Add a small amount of flour if needed to prevent sticking, from the remaining quantity of flour.
- Using a sharp knife, cut the dough into the necessary pieces. If making bread, cut the dough in half. Each half will become a loaf. If making rolls, cut the dough into 36 equal pieces.
- Grease the pans with extra canola or vegetable oil. If you plan to make both loaves of bread, you will need two standard bread loaf pans. For rolls, any baking pan into which you can comfortably fit the rolls will work fine.
- Shape the loaves or rolls. For loaves, roll each into a log, pinch the bottom seams closed, and press gently down into the pans. For rolls, pinch each piece of dough into a round ball, and place in pan. Rolls should touch eachother in the pan, and should be packed in somewhat snugly. Cover pan(s) with a clean, damp kitchen towel, and allow to rise in warm spot until doubled in size, at or just over the edge of the loaf pan. This will take roughly 40 minutes.
- Bake at 350 degrees (oven should be preheated already) for 30-40 minutes. Rolls will need more like 30 minutes, while bread will take a bit longer. Bread and rolls that are done should be golden-brown on top, and should sound slightly hollow when taped.
- Remove the loaves or rolls from the pan(s). Place on a cooling rack, and allow to cool thoroughly before storing.
- Store loaves or rolls in an airtight bag or container, preferably, where they should last easily for 4 or 5 days. Enjoy!



robert
July 30th, 2014 at 08:49